Quickstart Tutorial
In this tutorial, we will create a simple track for the Quattropic 1-bit engine for the ZX Spectrum beeper. We will only touch on some basic features of Bintracker. For a deeper dive, refer to the remainder of this User Manual.
Words of Caution
-
Bintracker looks and feels like a tracker. However, it is actually a powerful interpreter that runs a tracker app, among other things. Be alert when using it, like you would when browsing the internet or opening email attachments. As a rule of thumb, never open files, install add-ons, or run code snippets from untrusted sources on the internet in Bintracker, unless you have checked them and understand what they do.
-
Bintracker isn't finished yet. At the moment, it's more like a giant construction site plagued by a serious disregard for safety measures. So, better bring a helmet. Save often and don't expect things to "just work".
Prerequisites
This tutorial assumes that you have used a tracker before, and understand the general workflow, as well as some basic tracker jargon.
Set up Bintracker
There is currently no easy path to setting up Bintracker. For now, you'll have to build Bintracker from source and configure a few things manually. Follow the setup guide to get Bintracker up and running.
Startup
Launch Bintracker by double-clicking the bintracker executable, or launch it from the command line. The second option will allow you to see debug messages and low level errors, which is helpful when you're trying to figure out why Bintracker crashes.
On startup, Bintracker greets you with this welcome screen:
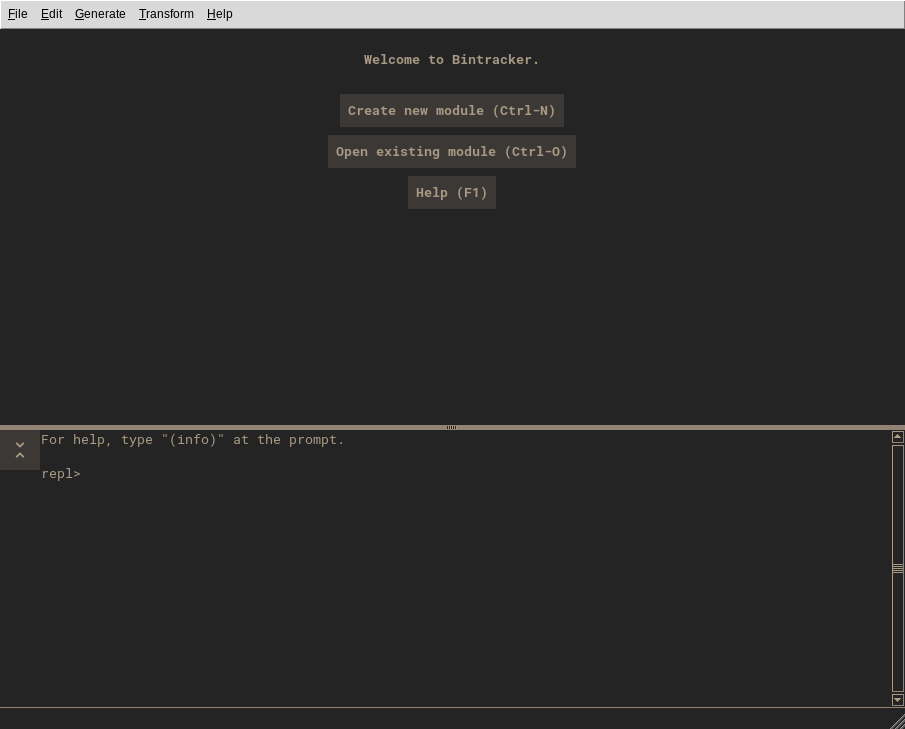
Click the "New File..." button, or type Ctrl-n. This brings up the engine (sound routine) selection dialog.
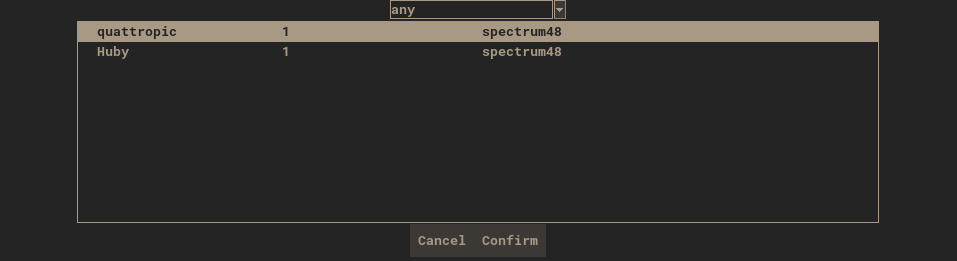
For this tutorial, we'll choose the Quattropic engine. Select "quattropic" from the list of available engines, then click Confirm or hit Enter. A new, empty module replaces the welcome screen, and an instance of the MAME ZX Spectrum emulator opens in a new window.
Module View
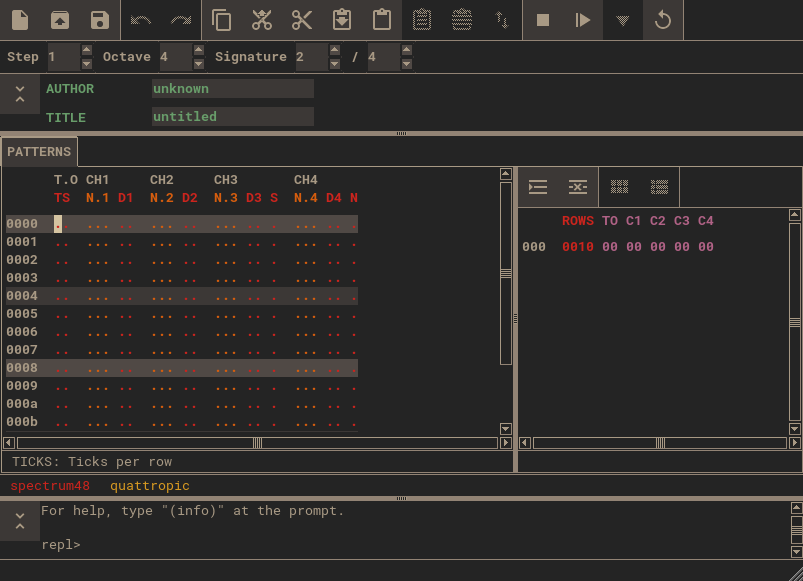
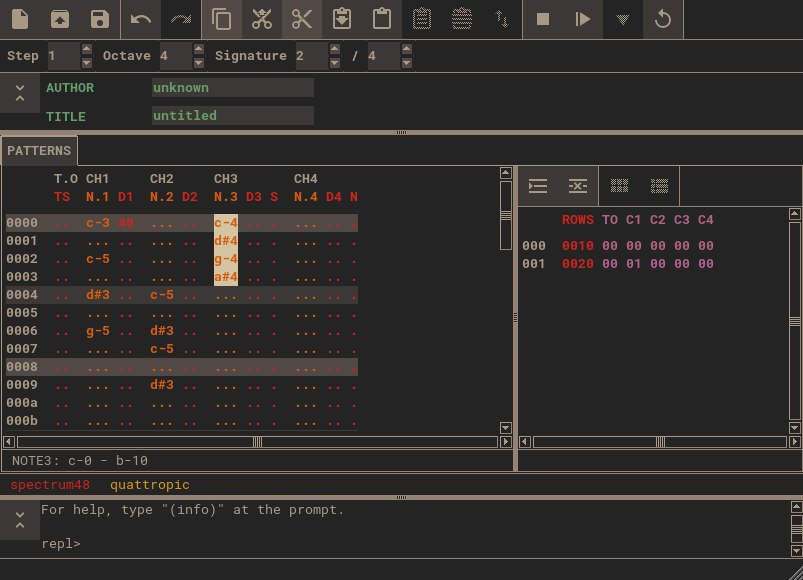
The Module View is the main display of your song. The layout of the module view depends on the engine you use. For Quattropic, we get a display with three panels, which are called buffers in Bintracker. Resize buffers as needed.
The horizontal buffer on top contains some global parameters of the module, such as the track title and the auther name. Parameters are called fields in Bintracker. We'll ignore the global field buffer for now.
The other two buffers are in a tab labelled "PATTERNS", below the global field buffer. On the left, there are the actual patterns, and on the right, there is the song sequence, also known as order list.
Editing
Navigation
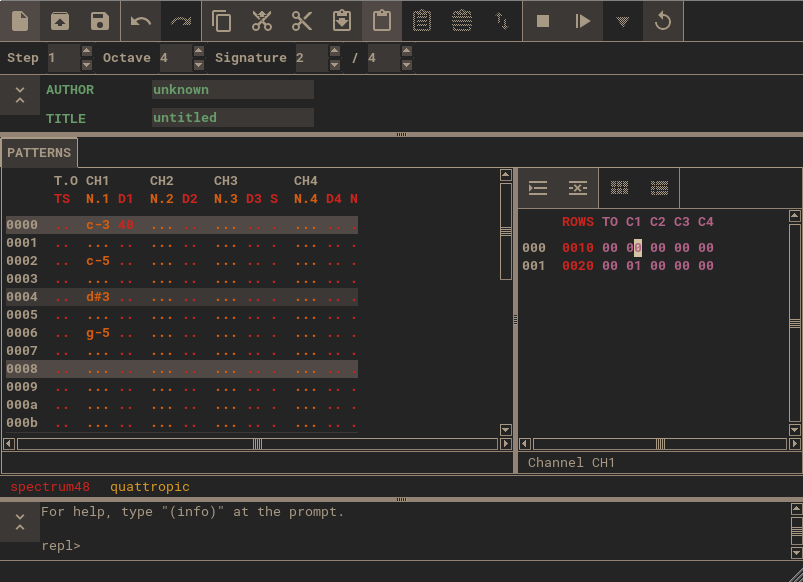
You can navigate within a buffer by clicking with the mouse, with the arrow keys, as well as the Home and End buttons. You can jump to a different buffer by clicking on it with the mouse, or pressing Ctrl-Tab to cycle through buffers. The status line at the end of pattern and sequence buffers tells you more about the function of the column that the cursor is currently on.
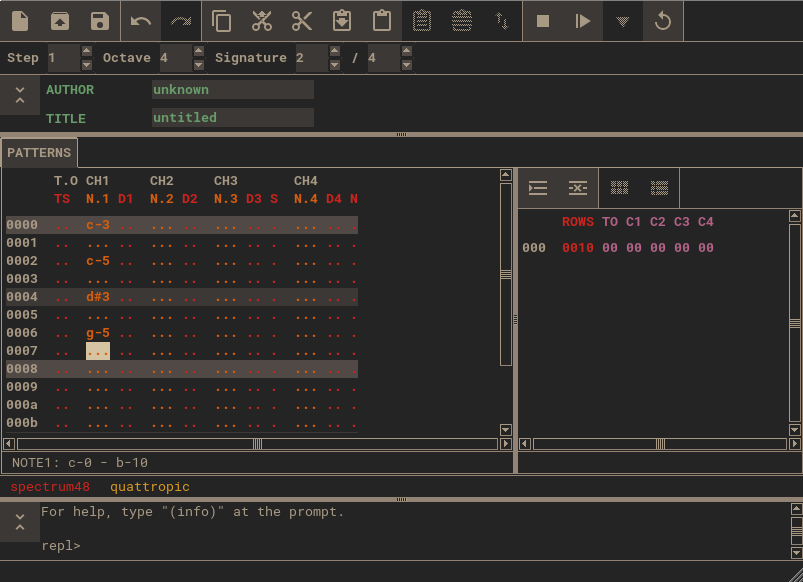
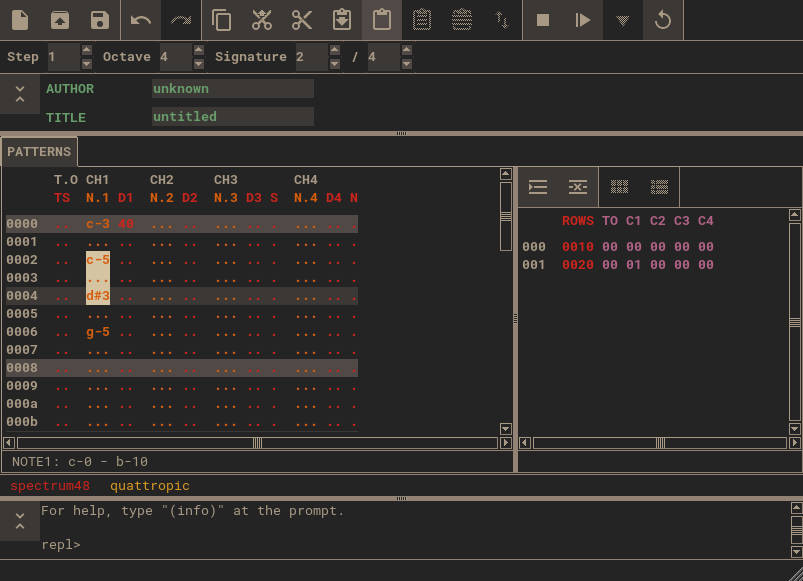
Navigate to the second column in the pattern buffer, which is labelled "N.1". The status line will now read "NOTE1: c-0 - b-10". This tells you that this is a note column, with a note range from C-0 to B-10.
Entering Notes and Parameters
Once you are in the NOTE1 column, you can start entering a simple melody. Like with all trackers, note keys are mapped to your keyboard in a piano-like manner. Pressing 1 enters a rest. Pressing shift while entering notes will reach one octave below the current base octave on the lower part of the keyboard, and one octave above on the upper part.
Press F5 or click the Play From Start button  to play the notes you have entered. Press
 F8 or click the Stop button  to stop playback.
Next to the NOTE1 column, there is a column labelled D1. On this column, you can set the duty cycle for channel 1. This is two digit (8-bit) hexadecimal value (you can change to decimal in the config file). Enter the value 40 on the first row of the D1 column. This changes the duty cycle to 25%. Play the song again to hear the difference.
Edit the Song Sequence
Press Control-Tab or click with the mouse to change to the sequence buffer. Move the cursor around to see the description for the columns.
The first column in any sequence is always the step length. Bintracker does not have a concept of pattern length - patterns are infinite by default. You tell Bintracker how many rows of a given set of patterns you want to play on a given step in the sequence.
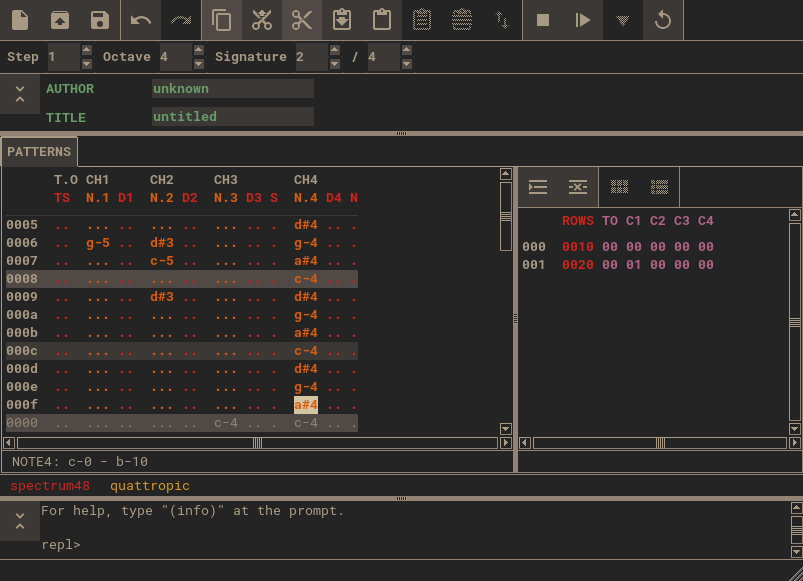
Change the value in the first column to 0020. Your patterns now appear twice as long.
The remaining 5 columns represent the five channels of Quattropic. (It may appear like there are only four channels, but in fact the Tempo column is a separate channel.)
Go to the third column (labelled C1), and change the value to 01. Whoops, your notes disappeared! Don't worry, we'll fix this in a bit. Before that, there's one important thing to know: Pattern numbers in Bintracker are unique per channel. This means that pattern 00 on C1 is different from pattern 00 on C2.
Let's insert a new sequence step by pressing Control-Insert, or clicking the Insert Row button  .
.
Now, change the first step on C1 back to 00. Your melody reappears to the left.
Copy&Paste
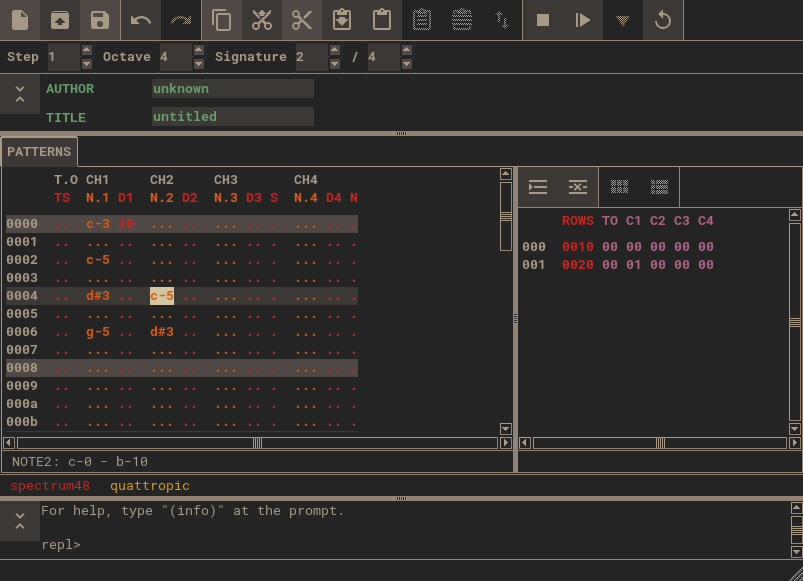
Navigate back to the pattern buffer. Put the cursor on the first note you entered in the NOTE1 column. Hold Shift and press the down arrow to select a few more notes.
Now, release the Shift key, and press Ctrl-c or click the Copy button  to copy the selection to the clipboard. Navigate to the column labelled
 N.2 and press Ctrl-v or click the Paste button  to paste the clipboard contents.
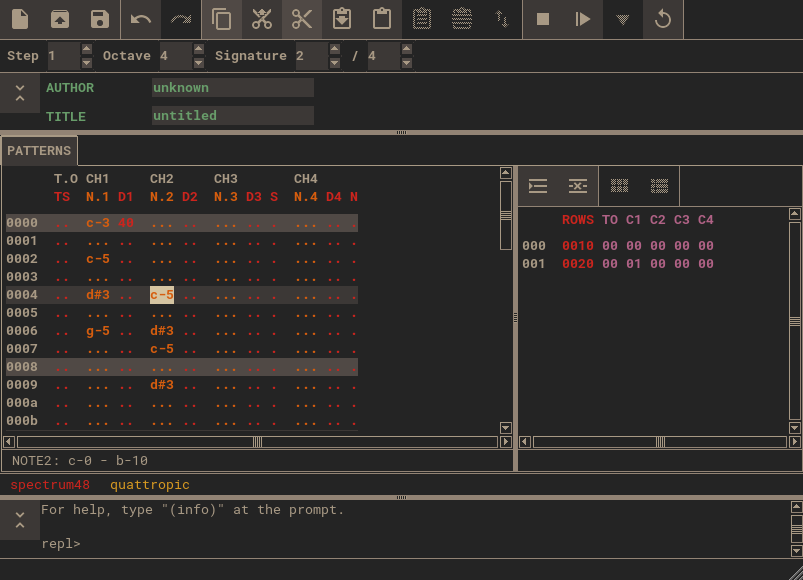
Navigate to the start of the pasted section, and press Ctrl-v again. Huh? Nothing happened, except the cursor moved! This is because pasting and inserting are two different things in Bintracker. Pasting replaces the current contents. It does not shift contents around. We just pasted the same contents twice, in the same spot, so nothing actually changed the second time.
Inserting, on the other hand, does shift contents. Move the cursor to a row above the pasted section, and press Control-Shift-v or click the Insert button  . Voilà.
The same distinction applies to clearing and cutting. Clearing deletes the selection contents without shifting the following data. Cutting does actually cut out the selection, shifting up content that follows the selection. Both clearing and cutting copy the selection to the clipboard first.
To clear a selection, press Ctrl-x or click the Clear button  . To cut a selection, press
 Ctrl-Shift-x or click the Cut button  .
.
Fill
Here's a little trick. In one of the note columns, enter three consecutive, different notes. Copy those three notes to the clipboard.
Now go to the first row of another note column, and press Shift-End to create a selection from the first to the last row of the pattern. Now paste the clipboard contents. The three notes are repeated across the pattern, creating a manual arpeggio.
When you create a selection and then paste or insert, the clipboard contents will be adjusted to fit the selection, dropping or repeating values as needed.
Saving and Exporting
Press Ctrl-s or click the Save button  to save your tune. Bintracker will prompt you for a file name.
To export your song, go to the File menu, and chose Export... > .bin to export your tune as an executable. Bintracker currently only supports raw binaries.
Congratulations, you have made it to the end of this tutorial. Have fun, explore, and remember to save often, because Bintracker will crash sooner than later at this point in its development.